
Installing Two Node OpenShift Cluster With Arbiter Node(TNA)
Installing Two Node OpenShift Cluster With Arbiter Node(TNA)
Today we are going to explore Two node OpenShift installation. This type of architecture is primarily developed for edge case scenerios. Please note that two node OpenShift clusters are in technology preview as I’m writing this post and should not be considered for production workloads for now.
However knowing two node OpenShift cluster is possible is exiting.
Before starting we should outline what tools and methods we are going to use.
Assisted Installer Service
This type installation is supported through Assisted Installer Service from console.redhat.com.
Assisted Installer provides users to install OpenShift cluster through an easy to use UI where users can configure cluster nodes for appropriate roles. The Assisted Installer also eliminates the traditional bootstrap node requirement by executing the bootstrapping process directly on cluster nodes, making it particularly well-suited for edge case deployments with limited compute resources.
Resource Requirements and Considerations
Please see the official resource requirements for TNA clusters by Red Hat.
For demonstration purposes we are going to use virtual machines but for production one should be using two baremetal servers + one arbiter server(to establish quorum).
As all OpenShift installations this type of install also requires some planning on DNS.
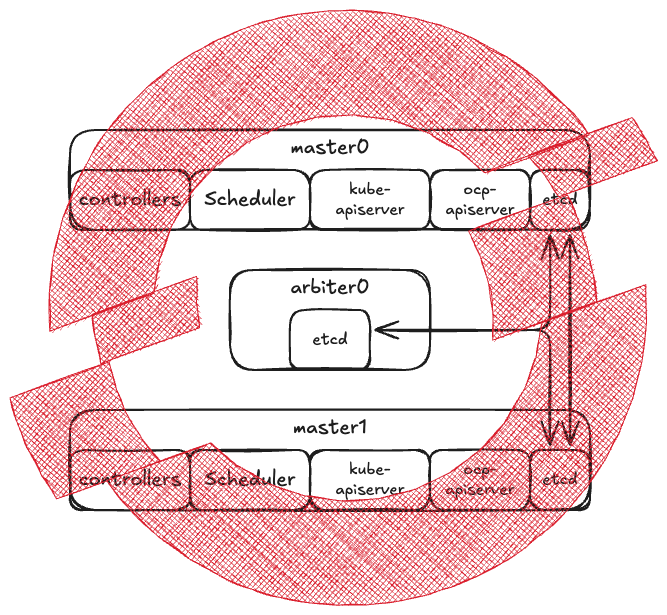
Architecture of TNA
Kubernetes relies etcd as its database and stores cluster data on it. It is a distributed key-value database that usually runs as a multi-node. Since it is running as distributed database It needs a protocol for consensus which is the raft protocol. Raft protocol requires minimum of 3 nodes hence It was not possible to install a HA OpenShift cluster with two nodes until now. The TNA architecture introduces an additional node called arbiter. Primary function of this node is to maintain etcd quorum and prevent split-brain scenarios. No other control plane services runs on this node.
Install Steps
Below are simplified install steps for TNA. Uses two Virtual Machines for control plane and one virtual machine for arbiter node.
Creating Dns Records
Before creating the cluster we first need to create some dns records. In my environment I’ve created A and PTR records for the machines. Also I’ve created records for API VIP and Wildcard Router VIP addresses.
Assisted Installer Steps
-
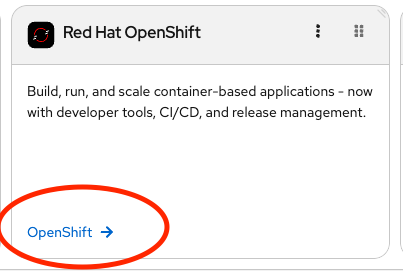
Login to your Red Hat account at console.redhat.com. Click on OpenShift tile.
-
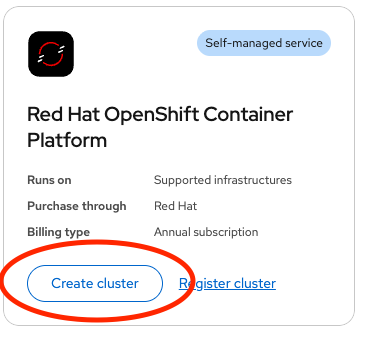
Click on Create cluster link.
-
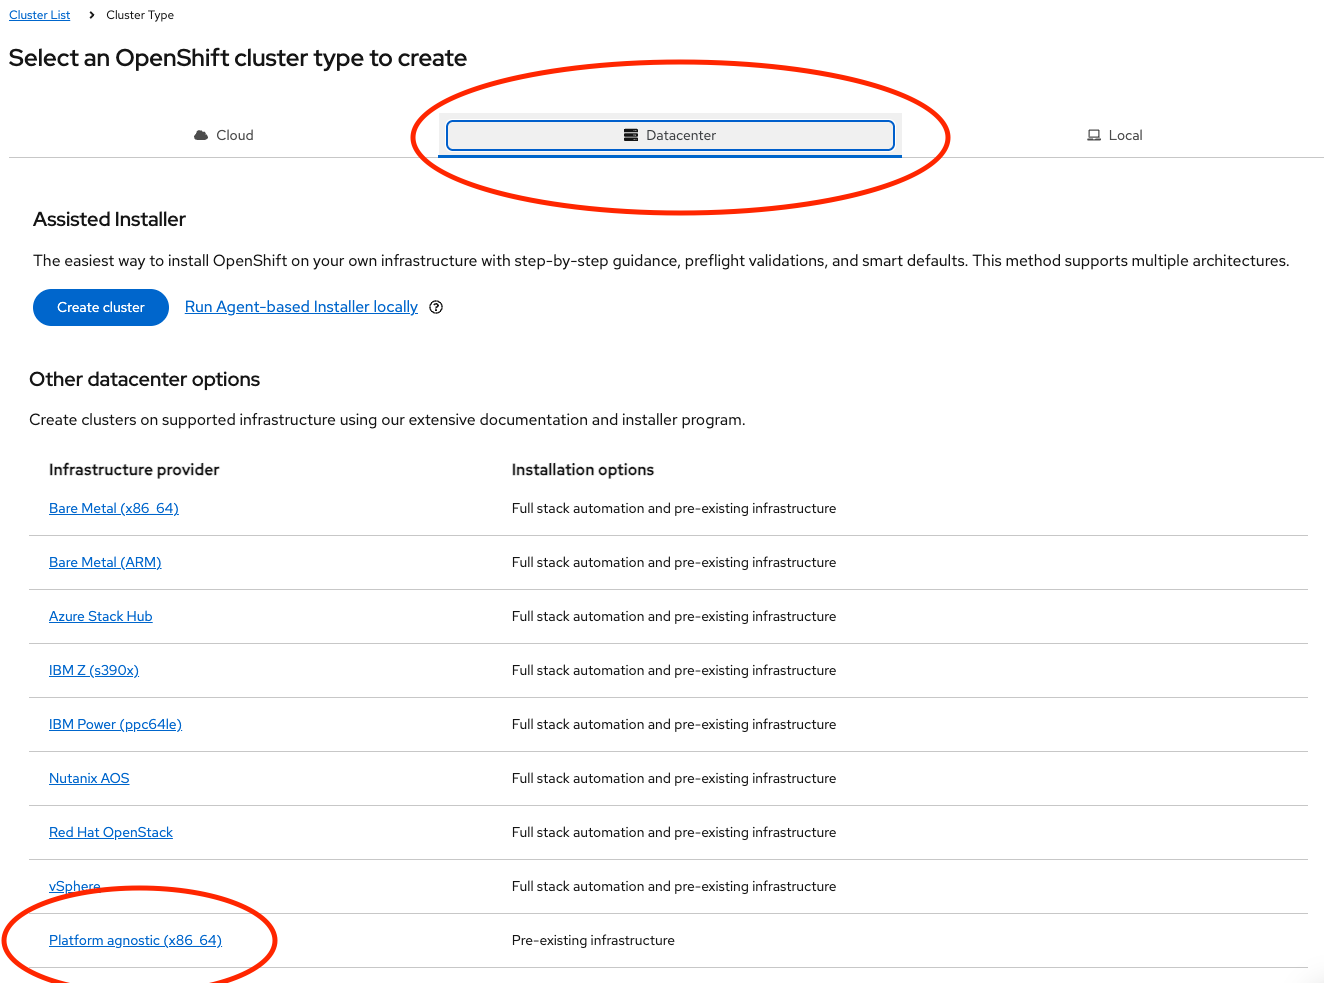
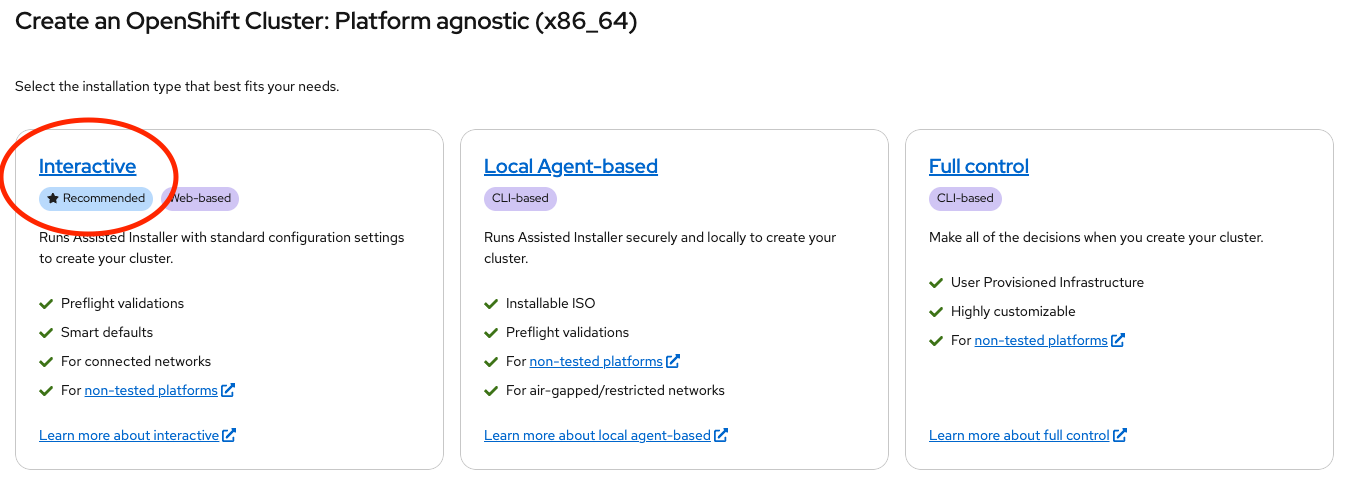
Use “Datacenter” tab and then fallow “Platform agnostic (x86_64)” link.
-
We are now selecting installation method. Click on the one says Interactive which is the Assisted Installer.
-
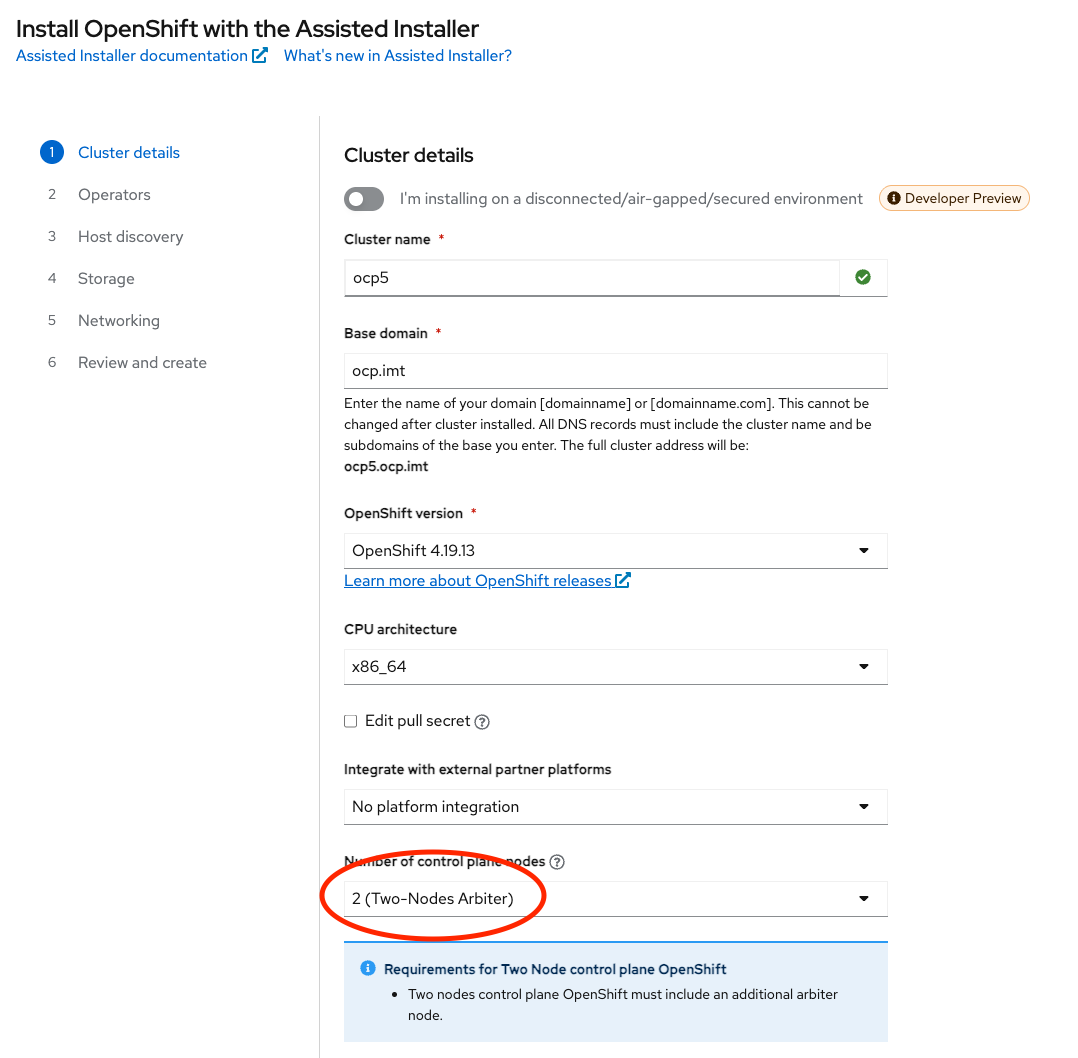
You are now given a form to fill out for you cluster. Fill out necessary ones, remember to select Two-Nodes Arbiter from Control Plane size option.
-
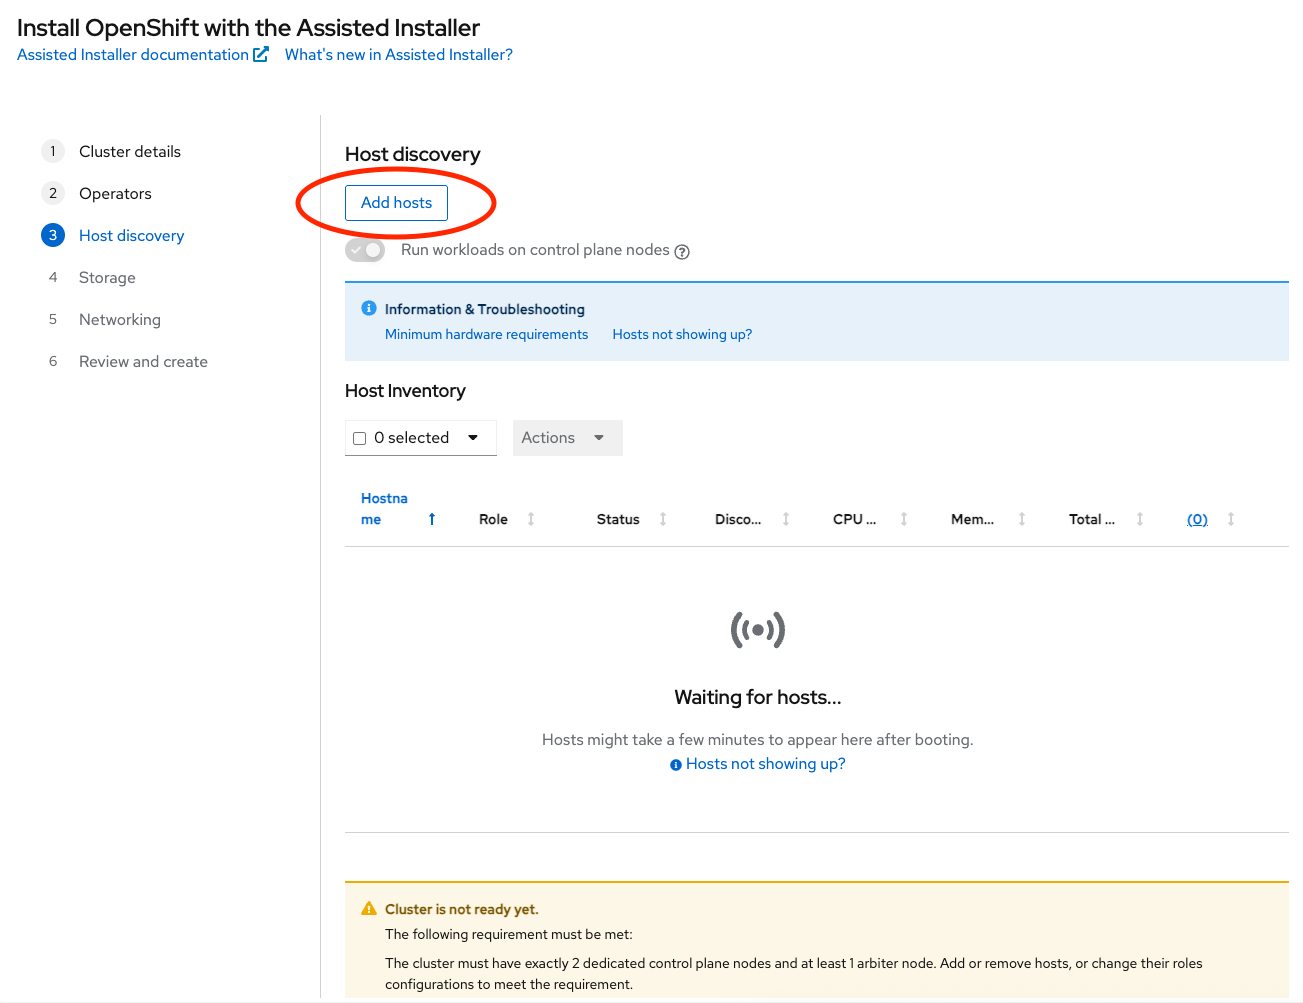
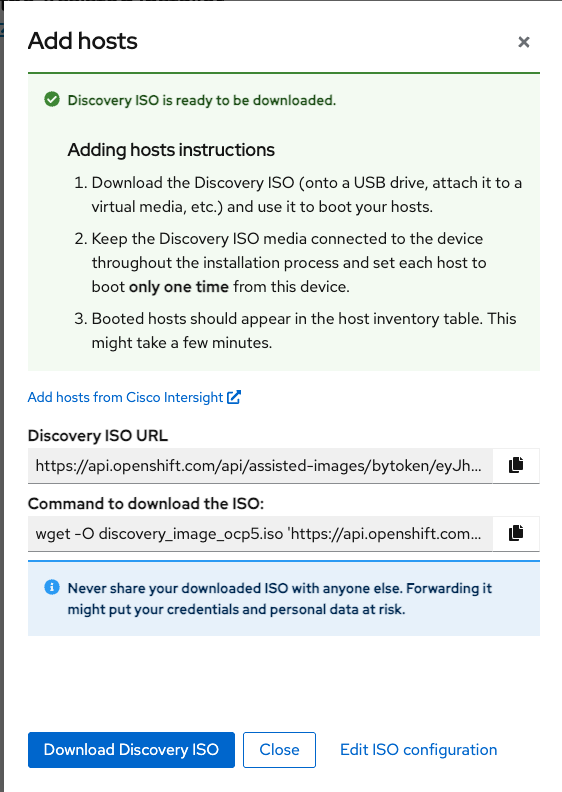
On the next screen you are expected to boot some machines so that Assisted Installer can continue for the install. Click on “Add hosts”
-
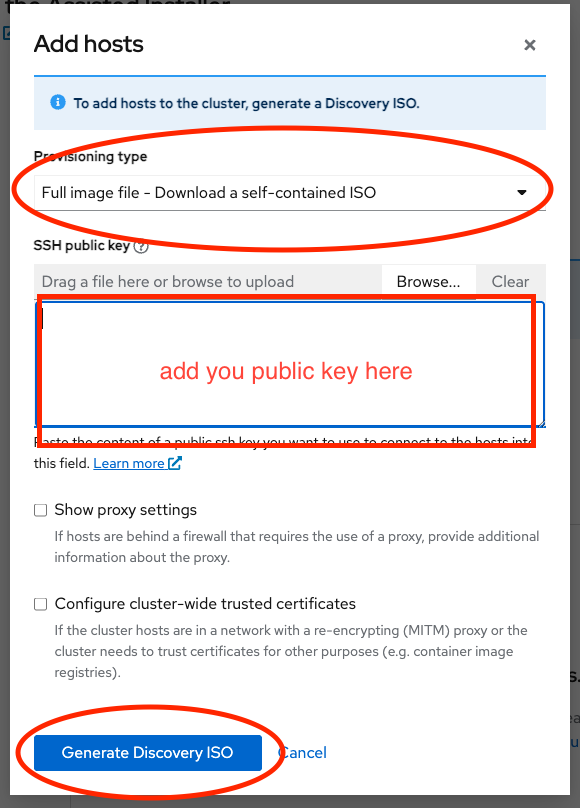
Select Full Image File , add you public key and click on “Generate Discovery ISO”, this will give you a bootable ISO for your machines.
-
Download the Discovery ISO and boot your machines with your preferable method. On this demo we are uploading ISO to our datastore.
-
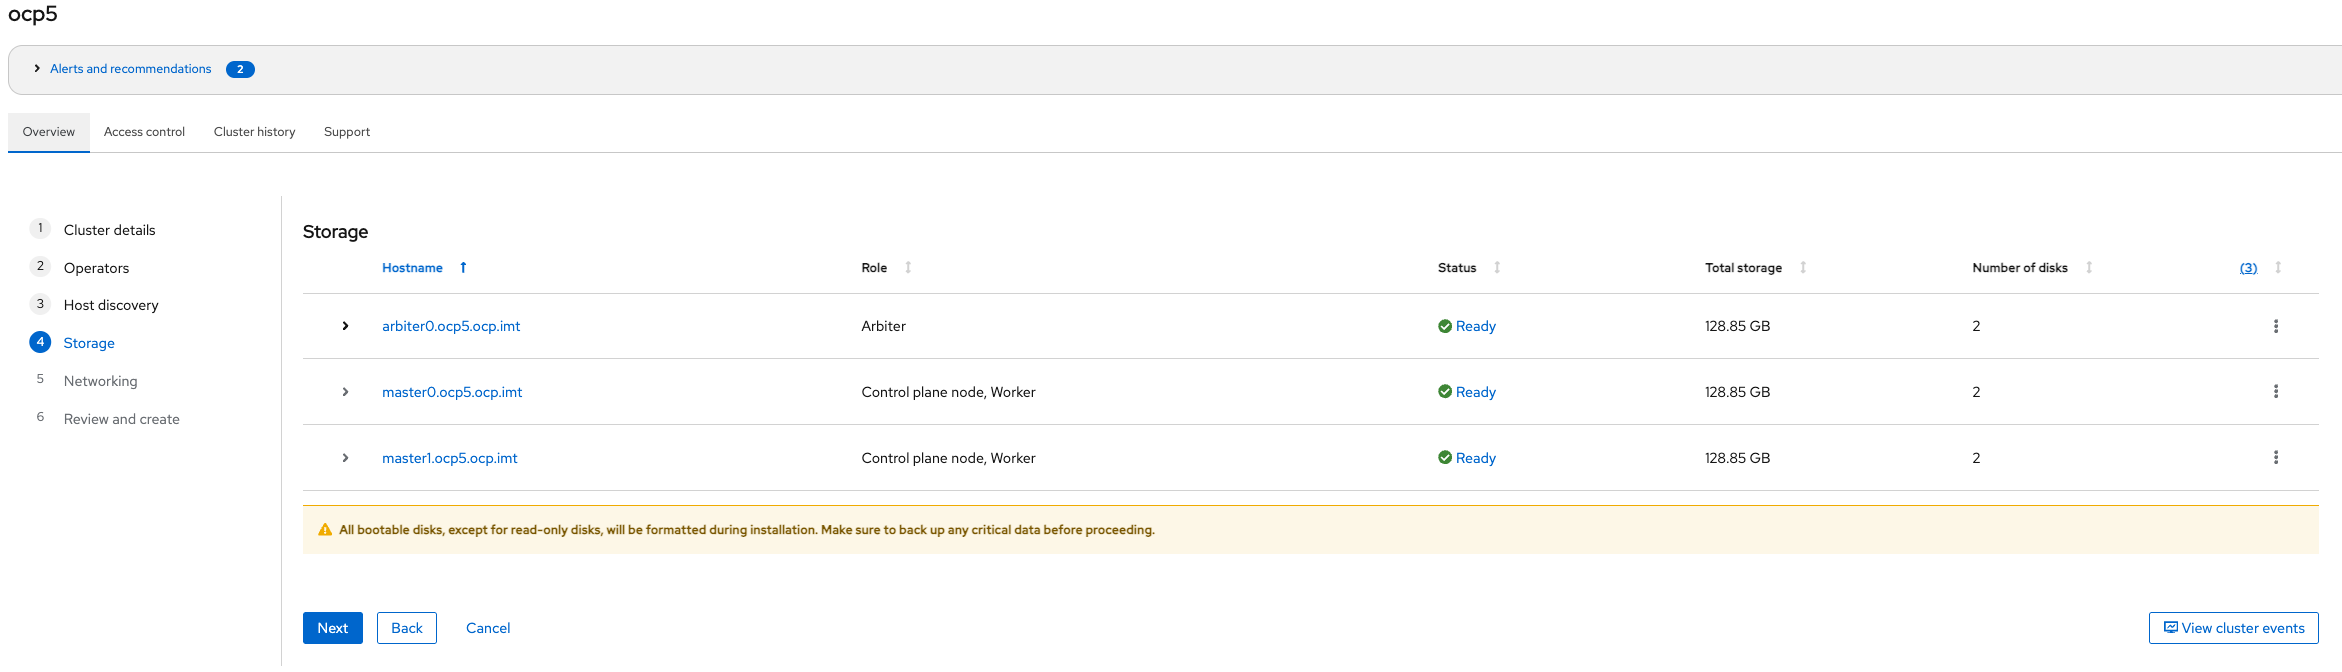
After booting your machines you should see them on the list. Select appropriate roles for your nodes.

-
Click Next in Storage step.
-
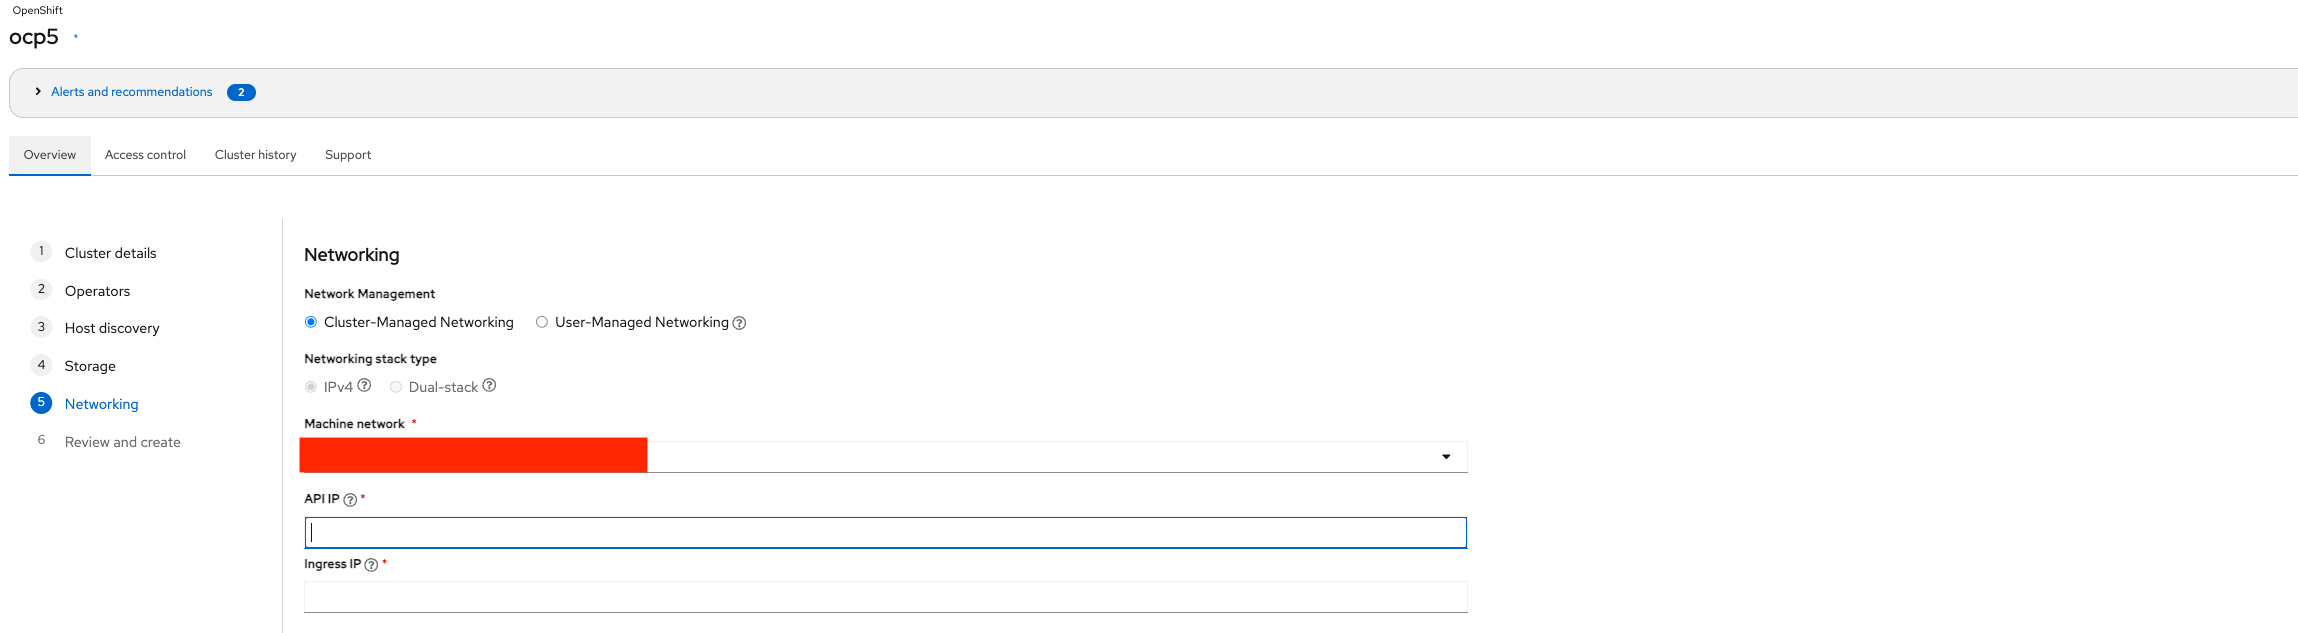
Last step is to configure networking part. Since we are using DHCP for node IP addressing we only need to give IP addresses for API and Router VIP’s. Click next after filling the form.
-
You see a review page, If everything is alright go click “Install Cluster” button.

-
You will see your cluster now booting up, wait until all nodes become ready. If anything goes wrong in this stage you can ssh into the nodes and look for the logs.


-
If everything went as planned now you are given kubeadmin password and kubeconfig file for the newly created cluster. Enjoy!

Result
Assisted Installer will give you kubeconfig file for the newly created cluster. You can go now and explore the cluster.
$ oc get node
NAME                    STATUS   ROLES                         AGE   VERSION
arbiter0.ocp5.ocp.imt   Ready    arbiter                       79m   v1.32.8
master0.ocp5.ocp.imt    Ready    control-plane,master,worker   79m   v1.32.8
master1.ocp5.ocp.imt    Ready    control-plane,master,worker   52m   v1.32.8
Tips And Tricks
- Be sure to add your public ssh key to discovery ISO. This will make your troubleshooting easier.
- Enable enableUUID = true parameter for VMware installations. This won’t be necessary for a production baremetal cluster.
- If you have issues with the installation ssh to nodes and try to fix by looking at logs. The most important service is agent.service. Review the logs via journalctl command.
sudo journalctl -u agent.service
Limitations to Consider
- You cannot convert TNA cluster to HA(3 node) cluster.
- Even you can create a cluster with two nodes, remember this is only possible with an arbiter node. Since arbiter node is only used for etcd purposes It can be a small machine. Note that It should have low latency disk for I/O, this is a requirement for successfull etcd deployment.